Home canning, like raising your own vegetables, has taken on new meaning and urgency during the pandemic. Last spring, people who hadn’t planted a garden in years — or perhaps ever — started growing vegetables and herbs in their yard or in planters on balconies and fire escapes.
Experienced gardeners upped their game, too. Seed companies reported record sales and ran out of many varieties. There was a growing sense of insecurity about where our food would come from as the reality of the pandemic sunk in.
Now, as we approach fall, gardeners are finding themselves in the position of needing to “put up” all the food they grew this summer. Canning equipment has sometimes been difficult to find. But it’s worth the effort to have your own home-grown produce available through the winter.
Canning makes many people nervous. Will the cans seal properly? Do I need to follow a specific formula to make sure there is enough acidity in my canned goods? Will I get botulism?
Deep breath — canning is not nearly as complex as you might think. But you do need to pay attention and follow a few basic steps to make sure your jars are properly and safely sterilized and sealed.
If canning seems like a lot of work, think of it this way. On a cold February evening, when local, fresh vegetables feel like a dream from a time far, far away, you’ll be able to open a jar of tomato sauce or peach jam to smell and taste an August garden. And this year, when shopping is problematic due to the pandemic, gifts of canning jars full of local produce will be hugely appreciated.
Here are some basic canning rules and a few of my most prized recipes for canning the summer harvest.
Canning Tips
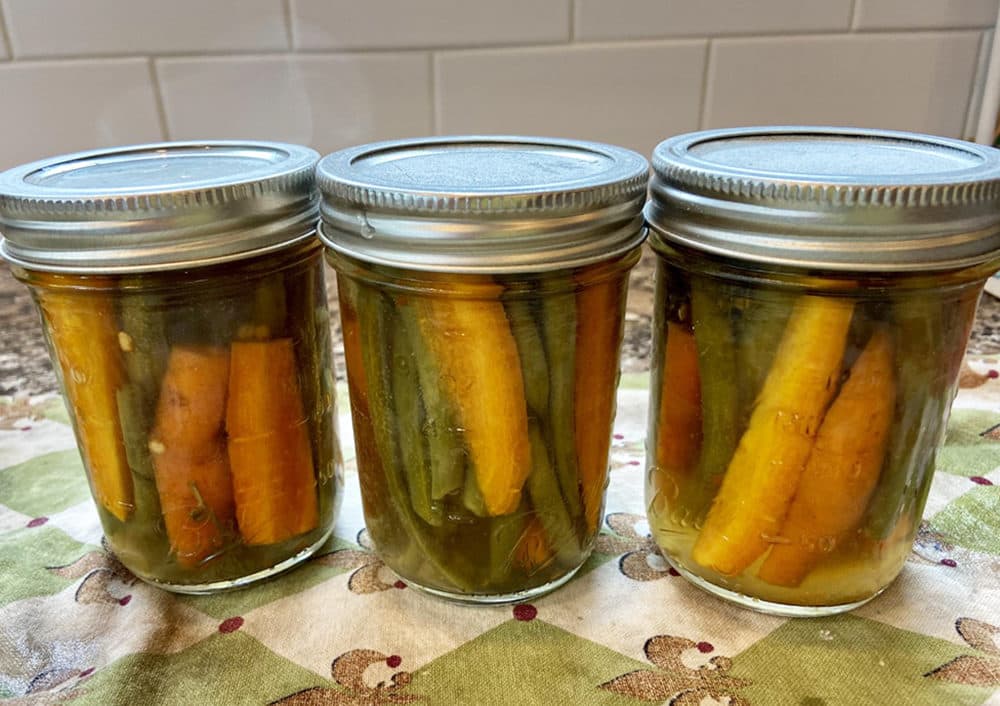
For years I spent entire weekends canning with a group of friends and it was such fun, but exhausting. We would crank out up to 200 jars! These days I enjoy doing small batch canning as fruit and vegetables become ripe.
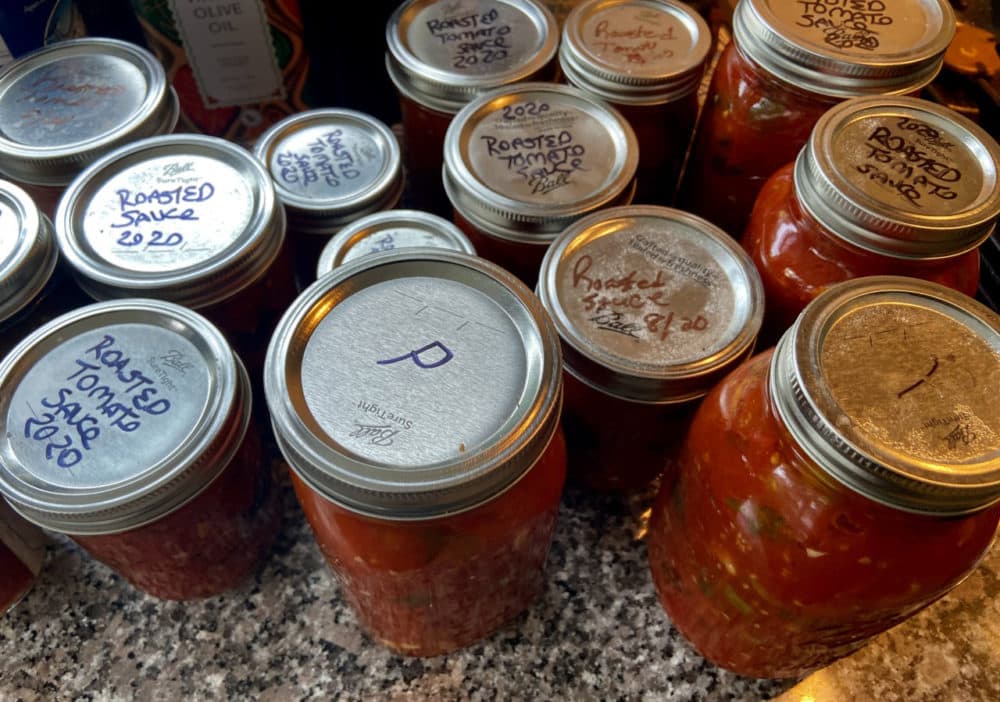
For instance, when my tomatoes ripen, I make a small batch of sauce and then put up 8 to 10 jars of sauce at a time. Generally, fruit and produce don’t all ripen at the same time, and small-batch canning guarantees that you process your produce at its absolute ripest. And that’s the whole point of canning.
The idea behind canning is to preserve the very freshest, ripest summer foods — be it seasonal fruit, vegetables or edible flowers — before they begin to decay. You want to capture that food at its finest moment and stop time.
Whether you are picking fruits and vegetables from your own garden or buying them from a local farmers market, this guide should help answer some of your canning questions and lead you to some great resources.
What You'll Need:
- Canning jars and brand-new lids: You can reuse old Mason jars and canning jars, but you must have new lids to make sure to get a safe seal on your jars.
- A large pot (12- to 16-quart canning pot or large lobster or pasta pot) that holds at least six jars without having them bump into one another. If jars bump against each other, they run the risk of cracking.
- A canning rack (that the jars fit into without bumping against each other) or a cooling rack or cake rack you can place upside down in the pot
- Counter space for working and letting clean jars dry
- Tongs or canning jar lifter (for lifting hot jars out of the boiling water bath)
- Clean dish towels for drying the hot sterilized jars on
- A marker to write the date and type of sauces/pickle directly on the jar, or labels or stickers to label the jars
How It Works:
- Wash all the jars and lids in hot soapy water or run through the dishwasher.
- Lids can be placed in a bowl of boiling hot water and left soaking until ready to use.
- Fill a large pot or canning pot three-quarters full and bring to a boil over high heat.
- Place the washed jars in the boiling water for about 5 minutes to sterilize.
- Drain the jars on a clean tea towel upright until dry.
- Fill the clean, sterilized dry jars as soon as possible with your sauce, pickles, jam, or chutney. Don’t let the sterilized jars sit around where they can run the risk of picking up bacteria.
- Fill the jars always leaving about 1/2 an inch of headspace.
- If there are bubbles trapped within a jar take a clean kitchen knife and run it around the rim of the jar. This will loosen any air bubbles.
- Be sure to run a paper towel or clean kitchen towel around the rim after you’ve filled the jars to make sure there’s nothing spilling over. Even the smallest bit of sauce on the outside edge can cause bacteria.
- Using tongs (you don’t want to use your hands and risk contamination) remove the lids and seals from the bowl of boiling water. Place the seal on top of the prepared jars. Then place the ring on top, being careful not to screw on the ring too tightly.
- Again, using long tongs, process the jars in the boiling water for the required amount of time.
- Follow the recipe or check United States Department of Agriculture instructions to see the length of time your sauce, jams, jellies, pickles or other foods need to process safely. Don’t take shortcuts: The time starts once your jars are lowered into the water and the water has once again come to a full rolling boil.
- Remove from the boiling water with tongs and place on a clean kitchen towel to cool.
- According to USDA Complete Guide to Home Canning: “Do not retighten lids after processing jars. As the jars cool, the contents in the jar contract, pulling the self-sealing lid firmly against the jar to form a high vacuum. If rings are too loose, liquid may escape from jars during processing, and seals may fail. If rings are too tight, air cannot vent during processing, and food will discolor during storage. Over tightening also may cause lids to buckle and jars to break, especially with raw-packed, pressure-processed food. Screw bands are not needed on stored jars. They can be removed easily after jars are cooled. When removed, washed, dried, and stored in a dry area, screw bands may be used many times. If left on stored jars, they become difficult to remove, often rust, and may not work properly again.”
- Listen: You might hear a "ping" or gentle thumping noise as the jars cool — that's the seal taking hold and means you have a good, safe jar.
- To test your jars for a safe seal: Once cool, remove the screw part of the lid and try to remove the lid by gently pulling on it. You're not really trying to remove the lid but test the seal. It should feel tight and hold. If the lid comes off easily it was not a good seal. You can place this jar in the refrigerator and enjoy the food in the next few days.
- Another test: Tap on the lid of the jars — they should all have the same sound. You should hear a hollow-sounding 'ping.' You should also see the center of the lid slightly sunken down, which also indicates a good seal.
- Always label and date your canned foods.
- Store the canned jars in a cool, dark spot, preferably a cellar, basement or dark pantry out of sunlight and heat. Use within one year, unless recommended for less time.
Canning Recipes
Peach Jam
It may sound overly simplistic, but the only thing you really need to make really great peach jam is really juicy, ripe seasonal peaches.
Makes six half-pint jars.
Ingredients
- 4 pounds ripe peaches
- 1/3 cup fresh lemon juice
- 1 1/2 to 2 1/2 cups sugar (I always opt for less sugar because I want to taste the fruit and not the sugar; however, you may need a touch more than 1 1/2 cups to create the proper gel and obtain a thickened jam)
Instructions
- If your peaches are very ripe you should be able to peel the skin off using your fingers. Working over a large bowl, use your fingers to loosen the skin off the fruit. If the fruit isn’t quite ripe, you’ll need to bring a large pot of water to a boil. Have a large bowl of ice water ready. Plunge the peaches into the boiling water for about 3 minutes; remove with a slotted spoon and immediately place in the ice cold water. The cold water will “shock” the peel right off. Remove from the water and remove the peel.
- Cut the flesh off the pit and coarsely chop the peaches. Place in a large bowl and gently toss with the lemon juice. Sprinkle with 1 1/2 cups of the sugar and cover and let stand for at least 2 hours, and up to overnight.
- Prepare six half-pint jars: Wash in hot soapy water. Place in a large pot of boiling water for 5 minutes to sterilize. Drain and dry.
- Place the peaches and all the juices from the bottom of the bowl into a large pot. Place over moderate to high heat and bring to a boil, stirring frequently to prevent burning on the bottom. Reduce the heat to moderate and cook, stirring frequently, for about 25 to 30 minutes, or until the peaches have cooked down, thickened and are thick enough that when you place a spoon into the jam it drips down slowly, not in a thin stream. Another test is to place a small plate in the freezer for at least 15 minutes. Place a spoonful of jam on the frozen plate. When you tilt the plate and the jam looks thick and is not runny it is ready.
- Divide the jam between the jars. Cover. The jam will keep in the refrigerator for almost 2 weeks, or you can process the jam for 10 minutes; it will keep for a year.
Chile Dilly Carrots And Beans
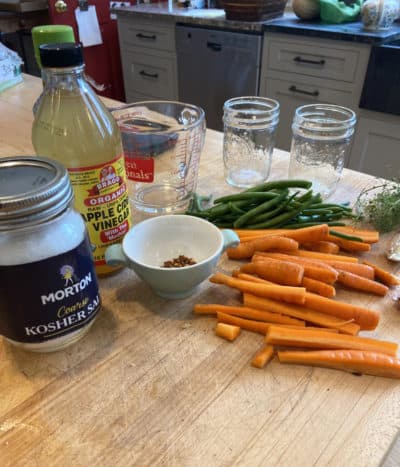
Dilly beans are a classic way to use an abundance of green beans. But this season, I also happened to have grown a lot of carrots. I cut the beans and carrots to fit into my jars, immersed them in a hot brine made of rice wine vinegar, cider vinegar, garlic, fresh dill sprigs and heads (the top of the dill plant), and chiles. I like the combination of flavors using rice wine vinegar and cider vinegar, but you can easily use a single vinegar of your choice.
These pickled vegetables are crunchy and colorful, and excellent served with cheese, curries, grilled meats or fish or just served as a snack.
Makes 6 half-pint jars or 3-quart size jars.
Ingredients
- 12 ounces green beans, ends trimmed and cut into 2 1/2-inch long pieces, about 3 cups
- 1 pound (16 ounces) carrots, cut lengthwise into sticks 2 1/2 inches long and about 1/2 an inch wide
- 1/2 cup fresh dill and dill heads if you can find them
- 1 cup rice wine vinegar
- 1 cup apple cider vinegar
- 2 cups water
- ¼ cup canning salt or ¼ cup plus 2 tbs. Kosher salt *
- 3 garlic cloves, peeled and cut into 4 long slices
- 1 1/2 teaspoons red chile flakes
*Pickling salt, also called canning or preserving salt, is granulated salt that doesn’t clump up or cake. It is preferred since it dissolves easily in brine. Kosher salt is another good alternative. Always use salt without additives. 1 ½ cups Kosher salt=1 cup canning or pickling salt.
Instructions
- Bring a large pot water to a boil.
- Clean the jars and lids in hot soapy water. Drain. Place in the boiling water for 5 minutes to sterilize; remove and place upside down on a clean tea towel to dry.
- Place your beans and carrots between the clean jars, stuffing as many as you can in side by side. Divide the dill and dill heads between the jars, pushing the herb down into the jars. Sprinkle the chile flakes on top of each jar.
- In a medium saucepan heat the rice wine vinegar, cider vinegar, water, salt, and garlic over high heat and bring to a boil. Remove from the heat.
- Ladle the hot brine over the beans and carrots, making sure to cover them completely; leave about 1/2 an inch of headspace at the top of each jar. Loosely cover the jars.
- You can refrigerate the jars for several weeks or process them for 10 minutes. Remove and let cool. The jars will; keep for up to a year.
Bread And Butter Pickles
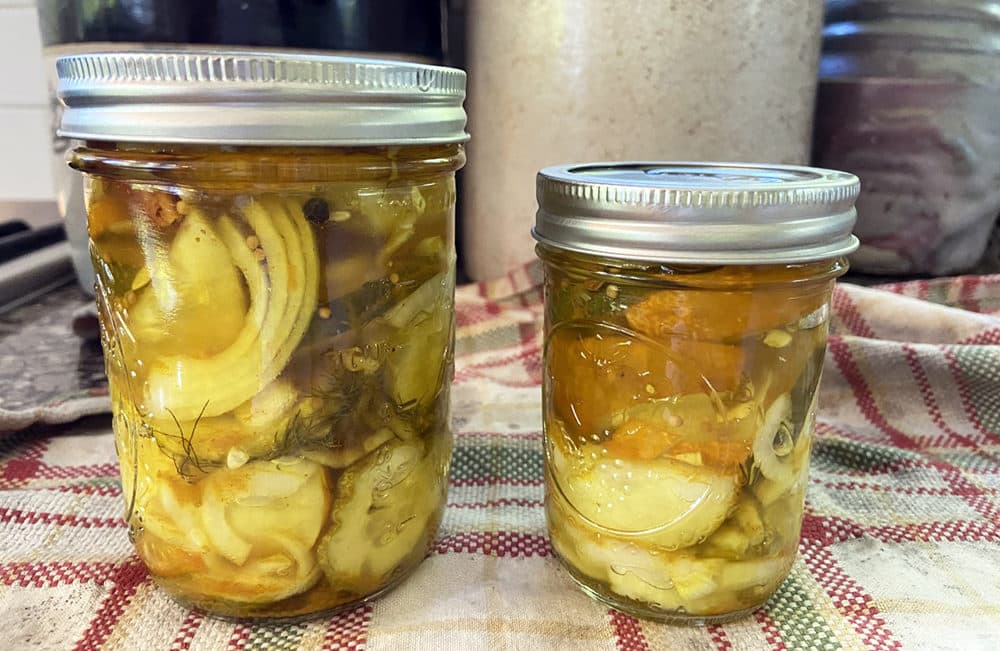
Cucumbers and thinly sliced onions are immersed in a hot brine of cider vinegar, coriander seeds, turmeric, mustard seeds, brown sugar, chile and fresh dill. Other than salting the cucumbers and onions for an hour, these pickles couldn’t be easier. Serve with cheese plates, sandwiches, curries, grilled meats and fish, or simply eat as a snack.
There are many stories about the origin of the term “bread and butter pickles.” Most seem to point to the Great Depression when they were used to make sandwiches when little else was available.
If you have a surplus of cucumbers the recipe can easily be double or tripled. You can also keep the pickles in your refrigerator for several weeks.
Makes 3 ½-pint size jars.
Ingredients
- 1 pound cucumbers, sliced into ¼-inch wide slices
- 1 medium onion, very thinly sliced
- 2 tablespoons Kosher or 1 ½ tablespoons canning salt
- ½ cup plus 2 tablespoons apple cider vinegar
- ½ cup water
- ¼ packed cup light brown sugar
- 1 tablespoon coriander seeds
- 2 teaspoons yellow or brown mustard seeds
- 1 teaspoon turmeric
- 1 small chile pepper per jar
- 1 teaspoon black peppercorns
- 1/4 packed cup fresh dill sprigs
Instructions
- Place the cucumber and onion slices in a colander and sprinkle with the salt. Let sit for 1 hour. Rinse well under cold running water and drain thoroughly.
- Meanwhile in a medium saucepan mix the vinegar, water, brown sugar, coriander seeds, mustard seeds, turmeric, chile peppers and peppercorns. Bring to a boil, making sure the sugar is dissolved and remove from the heat.
- To can: Wash three half-pint jars in hot soapy water. Drain. Sterilize the jars in boiling water for 5 minutes.
- Divide the cucumbers and onions in the jars, pushing down gently. Divide the dill and the chile peppers between the jars. Ladle the boiling hot vinegar solution on top of the cucumbers and onions, leaving ½ an inch of space on top. Wipe the edges of the jar clean and cover. Process in boiling water for 10 minutes.
Roasted Tomato Sauce And Puttanesca
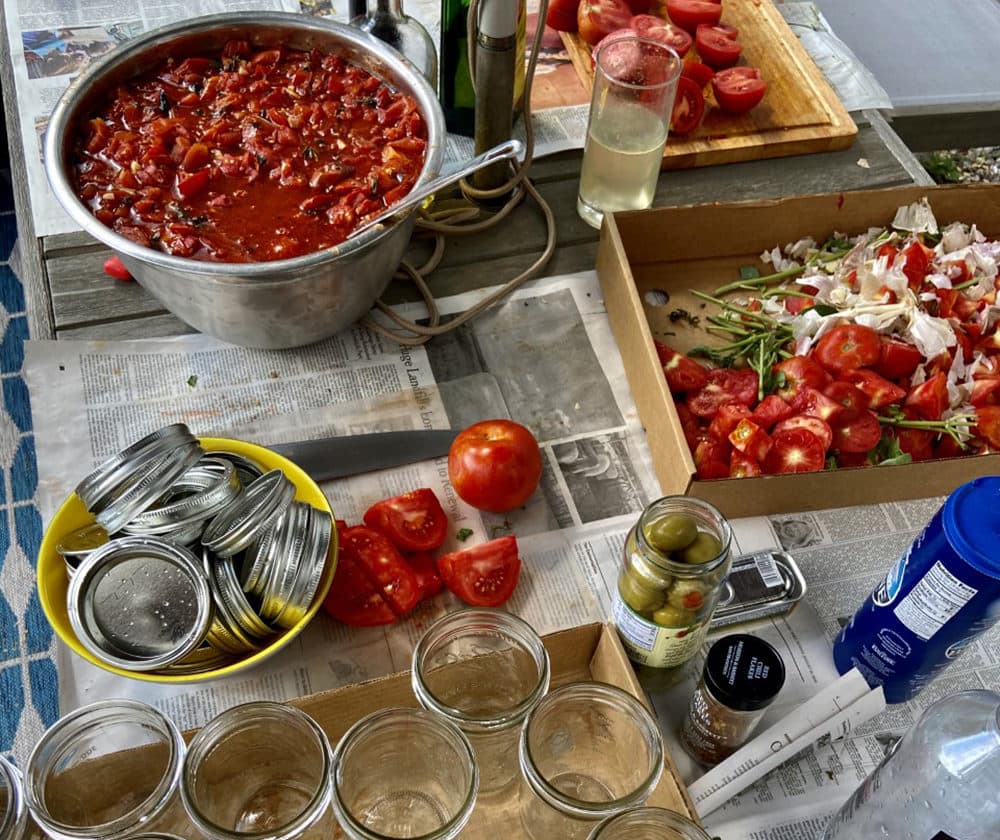
Roasting at a high temperature gives tomatoes a rich, slightly smoky flavor, and onions and garlic become sweet as they caramelize. For those that have a fear of canning, this is a no-fail tomato sauce that can be refrigerated for three to five days, or it can be frozen in a tightly sealed plastic bag for several months. The sauce can also be placed in sterilized Mason jars and processed (30 minutes in a boiling water bath); it will keep for up to 10 months.
Toss the sauce with pasta, serve it over grilled chicken or fish, or in any dish that calls for regular tomato sauce. You can cut the recipe in half or make a huge batch, depending on how many tomatoes you have. Feel free to add pitted olives, drained capers, chopped sweet or hot peppers, anchovies, or any other fresh herbs you have on hand.
Makes about 10 cups.
Ingredients
- About 8 pounds ripe tomatoes, any variety, cored and quartered (see note)
- 10 medium onions, peeled and quartered
- 5 garlic cloves, peeled and left whole
- 5 garlic cloves, finely chopped
- 1 cup chopped fresh herbs (rosemary, basil, thyme, oregano, parsley, and/or chives)
- About 1/3 cup olive oil
- ½ to 1 teaspoon salt, or to taste
- Generous grinding of black pepper
- A few tablespoons sugar (optional)
Note: I don’t peel my tomatoes when I make this sauce because the high roasting temperature produces a peel that is very edible. However, if you truly dislike tomato peels, simple remove them by dropping the tomatoes in a pot of boiling water for 60 seconds and then, immediately, drop them into a bowl of ice-cold water. The peel will come off easily.
Instructions
- Preheat the oven to 475°F.
- In a large roasting pan, gently toss together the tomatoes, onions, whole and chopped garlic, herbs, olive oil, salt, and pepper. Roast for 25 minutes. Gently stir the vegetables. Roast for another 25 minutes and gently toss. Add any of the optional ingredients listed above and roast for another 45 minutes, or until the tomatoes are softened and somewhat broken down into a sauce, with a golden brown crust on top. Remove and taste for seasoning. If the sauce tastes bitter, add a few tablespoons of the sugar.
- Let cool and place in clean, sterile jars or tightly sealed plastic bags, and refrigerate, freeze or can.
More Canning Recipes
More Information On Canning
Websites For Safe Canning:
Recommended Books:
"fruit" - Google News
September 16, 2020 at 11:01PM
https://ift.tt/3muIHGX
Canning Guide: Tips And Recipes For Preserving Your Favorite Vegetables, Fruit At Home - WBUR
"fruit" - Google News
https://ift.tt/2pWUrc9
https://ift.tt/3aVawBg
Bagikan Berita Ini


0 Response to "Canning Guide: Tips And Recipes For Preserving Your Favorite Vegetables, Fruit At Home - WBUR"
Post a Comment